

Moss Pole for Indoor Plants: How to Use, Install, and Get Bigger Growth
Valerie
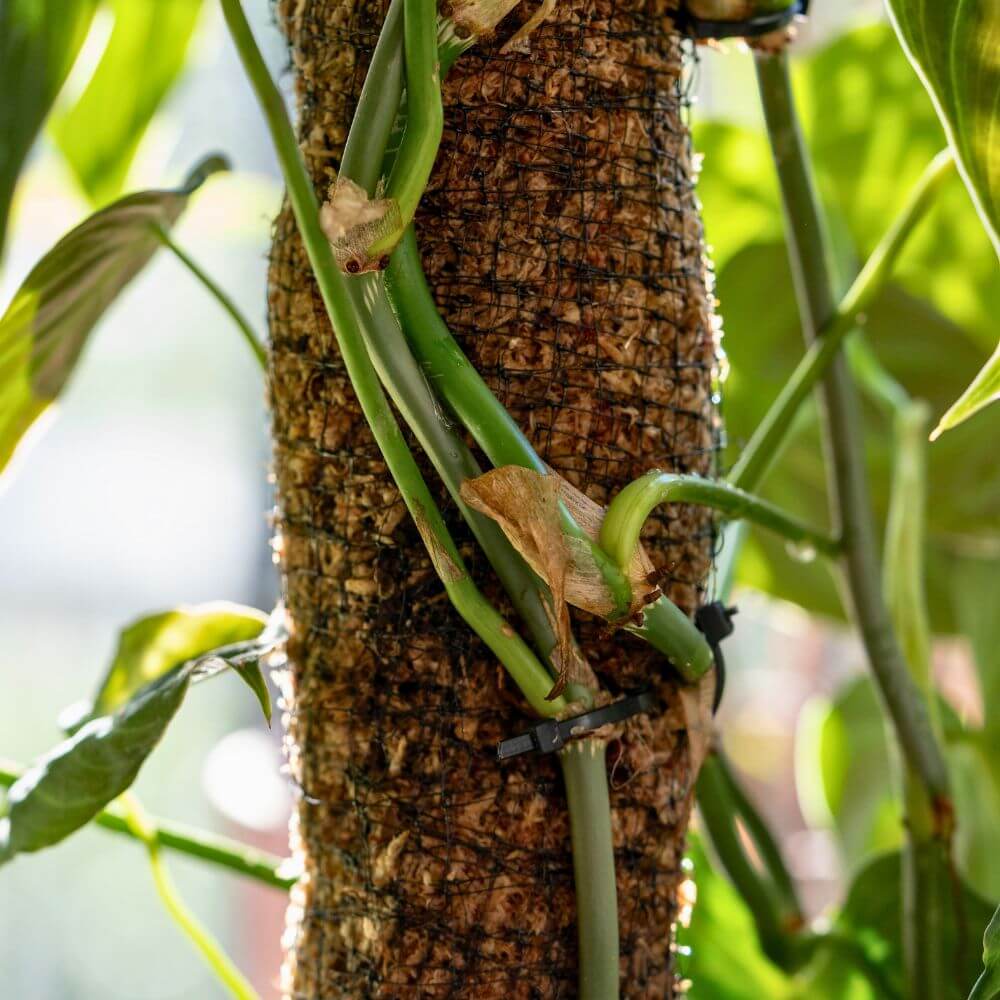
What Is a Moss Pole and Why Do Indoor Plants Grow Better With One?
Is Your Plant Ready for a Moss Pole? Here's Exactly When to Add One
The Real Reason Moss Poles Produce Bigger Leaves and Faster Growth
Pre-Filled vs DIY Moss Poles: Which One Actually Gets Better Results?
How to Prepare Sphagnum Moss for a DIY Moss Pole Installation
Moss Pole Mistakes That Slow Growth — And How to Fix Them Fast
Frequently Asked Questions About Moss Poles for Indoor Plants
What Is a Moss Pole and Why Do Indoor Plants Grow Better With One?
A moss pole is a vertical support structure — typically filled or wrapped with sphagnum moss, coco coir, or a similar moisture-retaining medium — that gives climbing plants something to grip, anchor into, and grow upward along.
Most tropical houseplants are natural climbers. Monstera, Pothos, Rhaphidophora, and Philodendron do not grow along the ground in the wild — they climb trees, wrapping aerial roots around bark and pulling moisture from the surface as they ascend. The higher they climb, the larger their leaves become. Indoors without support, these plants sprawl, stay small, and never reach the size or leaf development they are actually capable of.
A moss pole changes that. It gives the plant a vertical path to follow and a moisture-rich surface for aerial roots to attach to — replicating the conditions that trigger bigger leaves, stronger stems, and the kind of growth most plant owners only see in photos.
Is Your Plant Ready for a Moss Pole? Here's Exactly When to Add One
The best time to add a moss pole is earlier than most people think — before the plant needs it, not after it has already outgrown its pot and started vining across your shelf.
Add a moss pole when:
Your plant has produced 4 or more leaves and is showing active upward or outward growth
You see aerial roots developing along the stem — this is the plant actively searching for something to climb
New leaves are coming in smaller than previous ones, which often signals the plant wants vertical support to trigger larger growth
Your Monstera, Pothos, or Philodendron is starting to trail or sprawl and you want to redirect that energy upward
You are repotting — this is the least disruptive time to install a pole since you are already working with the root system
Do not wait until:
The plant is severely root bound — adding a pole to a stressed plant adds more stress
Stems have become woody and rigid — younger, flexible stems attach to moss poles far more easily than older hardened growth
The plant has already developed a strong trailing habit — redirecting a plant that has been trailing for months takes significantly more time and effort than guiding one from the start
The earlier you introduce vertical support, the faster and more naturally the plant adapts to climbing it.

The Real Reason Moss Poles Produce Bigger Leaves and Faster Growth
The size difference between a supported climbing plant and an unsupported one is not subtle. Monstera leaves on a well-established moss pole setup can be two to three times larger than leaves on the same plant left to trail. This is not just aesthetics — it is biology responding to environment.
Here is what is actually happening:
Vertical growth triggers a size response. In the wild, climbing plants grow larger leaves as they ascend because higher up means more light competition. The plant reads vertical movement as a signal to invest in bigger leaf surface area to capture more light. A moss pole triggers this same response indoors.
Aerial roots access moisture and anchor growth. When aerial roots attach to a damp moss pole they begin absorbing moisture and micronutrients directly from the surface — supplementing what the root system in the soil delivers. This dual feeding system supports faster, larger growth than soil roots alone.
Supported stems direct energy into leaves not structure. A trailing or unsupported plant uses a significant portion of its energy maintaining stem rigidity across a horizontal plane. A supported climbing plant offloads that structural work to the pole and redirects the energy into producing larger, more complex foliage.
Fenestrations develop more reliably. Monstera fenestrations — the characteristic splits and holes in mature leaves — develop in response to environmental maturity signals. Vertical climbing on a textured surface is one of the strongest signals the plant uses to determine it is time to produce fenestrated leaves. Plants left to trail often stay in juvenile leaf form indefinitely.
The moss pole is not just support. It is the trigger for the plant to become what it is actually capable of being.

Types of Moss Poles for Indoor Plants
These flexible mesh poles are perfect for shaping vines and redirecting growth. Great for beginners and multi-plant setups, offering adjustable support without bulk.
Not all moss poles are built the same and the type you choose affects how well your plant climbs, how easily you can maintain moisture, and how long the setup lasts. Here is what each type offers and which plants benefit most from each.
Sphagnum moss poles are the gold standard for tropical aroids. The sphagnum holds moisture exceptionally well, stays loose enough for aerial roots to penetrate, and creates the closest approximation to natural bark and moss surfaces these plants evolved climbing. Best for Monstera, Philodendron, and Rhaphidophora.
Coco coir moss poles are denser and more structured than sphagnum. They hold their shape longer and are easier to keep evenly moist through misting. Slightly less penetrable for aerial roots than sphagnum but extremely durable and a strong choice for heavier climbing plants.
Modular poles are stackable sections that extend as your plant grows. This is the most practical option for fast-growing plants like Monstera Deliciosa that will eventually outgrow a standard single pole. You add sections upward without disturbing the plant or its root attachment.
Plastic mesh poles are the most affordable and DIY-friendly option. The open mesh structure can be filled with sphagnum or coco coir and allows for excellent airflow around the root attachment zone. Highly customizable and easy to refill when moisture levels drop.
This traditional sphagnum moss pole provides moisture-retentive support for climbing plants like Monstera and Philodendron. Ideal for encouraging aerial root attachment and upright growth.
This stackable coco coir moss pole allows you to extend support as your plant grows. A low-maintenance alternative to sphagnum, perfect for steady vertical training.
Modular Moss Poles:
Coco Choir Poles
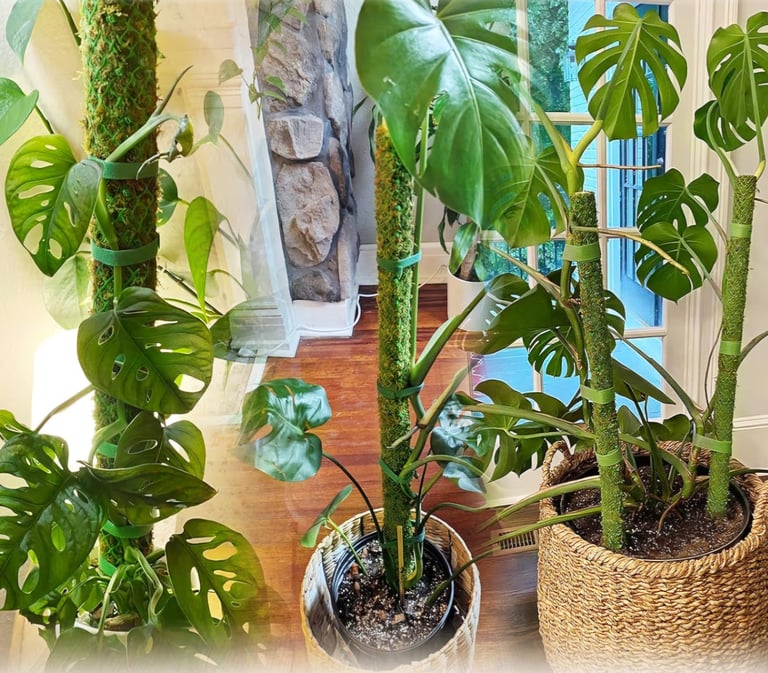
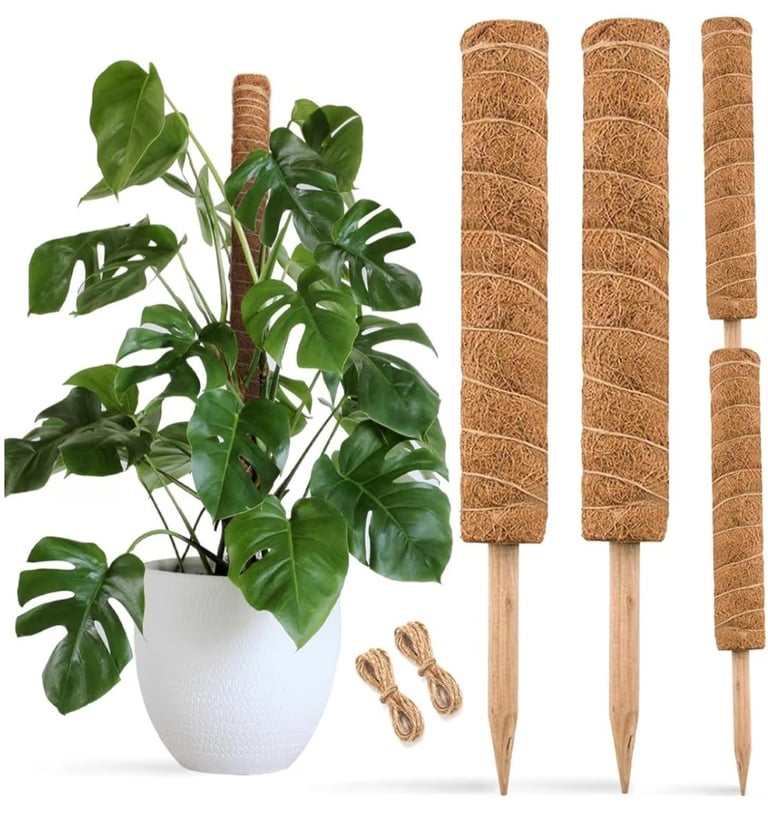
This modular mesh moss pole allows you to fill it with your own sphagnum moss for customizable moisture control. Ideal for larger climbers and long-term growth systems.
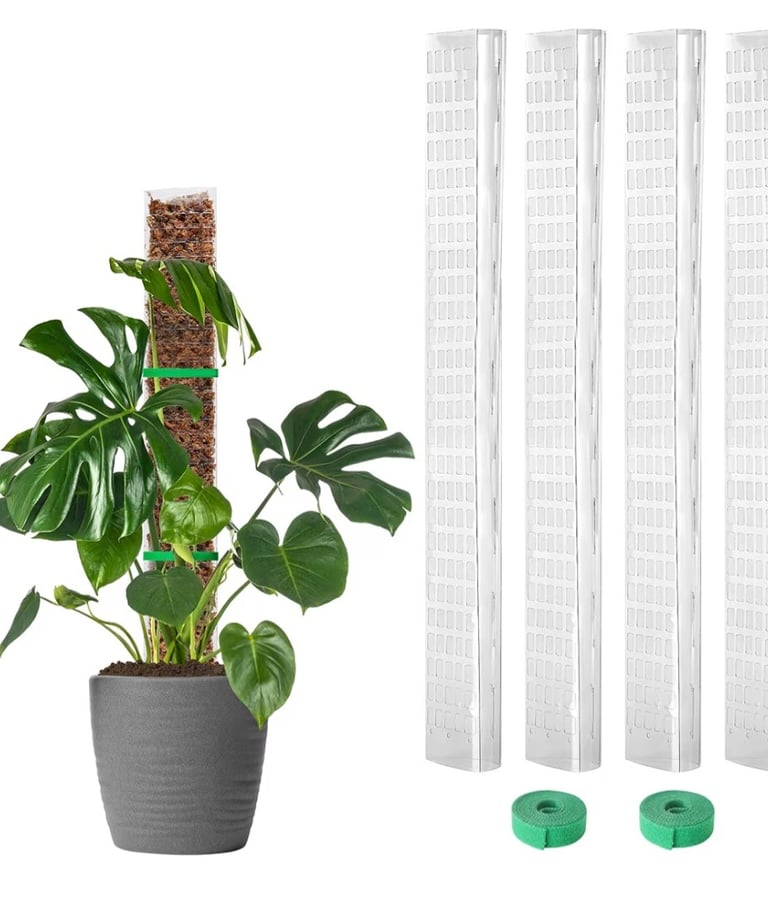
Sphagnum Moss Poles:
Plastic Mesh Moss Poles
Not all plants climb the same - explore more options based on your setup.

Pre-Filled vs DIY Moss Poles: Which One Actually Gets Better Results?
Both work. The one that gets better results for you depends entirely on how much time you want to invest upfront and how much control you want over the long term.
Pre-Filled Moss Poles — Ready to Use
Pre-filled poles come packed with sphagnum moss or coco coir and are ready to install straight out of the packaging. No prep, no mess, no guesswork on fill density.
Best for beginners, anyone setting up their first climbing support, and plant owners who want a clean low-effort system that works immediately. The trade-off is less control over moisture levels and fill material — you get what the manufacturer packed, which varies in quality between brands.
What makes a good pre-filled pole: Dense, even fill with no hollow spots. Sphagnum or coco coir that feels damp when lightly misted and retains moisture for several days. Sturdy enough to support a mature climbing plant without bending.
DIY Moss Poles — Custom Setup
DIY poles give you full control over every variable — fill material, density, moisture retention, and structure. You choose the pole diameter, the medium, how tightly it is packed, and how it is secured. This upfront investment pays off significantly over time because DIY poles are easier to refill, easier to maintain, and can be customized for the exact moisture needs of your specific plant.
Best for plant collectors, anyone growing large or fast-climbing species long term, and growers who want to dial in moisture consistency for maximum aerial root attachment and leaf size.
Pros: Fully customizable, easier to refill and maintain over time, better moisture control, more cost effective for multiple plants.
Cons: Requires setup time, slightly messier to assemble, small learning curve for first-time builders.
Which one should you choose?
If you want zero prep and immediate results — start with a pre-filled pole. If you are building a long-term setup for a plant you plan to grow large — invest the hour in a DIY build. The DIY setup will outperform a pre-filled pole within one growing season and cost you less over time.
Either way — get the pole in early, keep it moist, and let the plant do the rest.
Choose a setup that fits your routine and maintain it consistently as your plant grows

How to Prepare a Pre-Filled Moss Pole Before You Install It
A pre-filled moss pole straight out of the packaging is almost always too dry to be useful. Aerial roots will not attach to a dry surface — moisture is what signals the root to grip and begin absorbing. Installing a dry pole and expecting immediate attachment is the number one reason beginners think moss poles are not working.
Preparation takes ten minutes and makes a significant difference:
Soak or thoroughly saturate the entire pole before installation. The most effective method is submerging the pole in a bucket or sink of water for 15 to 30 minutes until the fill material is evenly moist throughout — not dripping but holding moisture when you press it. If full submersion is not practical, mist the pole heavily from all sides and allow it to absorb for at least 10 minutes before installing.
Check for dry spots by pressing along the length of the pole. Any area that feels firm and dry rather than slightly springy and damp needs more moisture before the pole goes in.
Once installed, mist the pole two to three times per week to maintain surface moisture. Aerial roots attach fastest to consistently damp surfaces. Let it dry out between mistings but never to the point where the surface feels bone dry to the touch.

How to Prepare Sphagnum Moss for a DIY Moss Pole Installation
Looking for quality Sphagnum moss?
Dry sphagnum moss straight from the bag is compressed, brittle, and ineffective as a climbing medium until it has been properly hydrated. Rehydrating it correctly before building your pole is the difference between a moss pole that aerial roots attach to enthusiastically and one that sits ignored for months.
How to rehydrate sphagnum moss for a DIY pole:
Place the amount of sphagnum you need into a bucket or large bowl and cover with room temperature water. Allow it to soak for a minimum of 15 minutes — 30 minutes is better for compressed or very dry moss. The sphagnum will expand significantly as it absorbs water.
After soaking, take a handful and squeeze it firmly. The goal is lightly moist — it should hold its shape when squeezed and feel damp without dripping water. If water streams out when you squeeze it, it is too wet and needs to be spread out and allowed to dry slightly before use. Moss that is too wet when packed into a pole creates anaerobic conditions that cause bacterial buildup and root rot rather than healthy root attachment.
Pack the rehydrated moss firmly enough that it holds its shape and does not shift when the pole is moved, but not so densely that aerial roots cannot penetrate the surface. A medium-firm pack — similar to how you would pack a snowball — is the right density for most climbing plants.
How to Install a Moss Pole Without Stressing Your Plant
Installation is most successful when done at repotting time. If you are adding a pole to an established plant without repotting, work carefully and prioritize minimizing root disturbance over getting a perfect pole position.
Step by step:
Choose the right pole height. Select a pole that is at least as tall as your plant's current height and ideally 12 to 18 inches taller to give the plant room to grow upward without immediately outgrowing the support. For fast growers like Monstera Deliciosa, use a modular pole system from the start.
Position the pole before adding soil. If repotting, place the pole in the center or slightly toward the back of the pot before settling the root ball around it. This lets you anchor the pole firmly without disturbing established roots.
Press the pole firmly to the base of the pot. The pole needs to be stable enough to support the weight of a mature climbing plant. If it wobbles, the plant will not attach confidently and heavy growth can tip the entire setup.
Guide stems toward the pole gently. Do not force stems into tight contact with the pole. Use soft plant ties, twist ties, or strips of pantyhose to loosely attach stems at several points along the pole. Loose contact is enough — the aerial roots will do the work of anchoring once moisture draws them in.
Mist the pole immediately after installation and maintain consistent moisture from this point forward. The first two to four weeks after installation are the critical attachment window. Keep the pole surface consistently damp and the plant will begin sending aerial roots toward it naturally.
A secure base prevents shifting and keeps your plants supported as they climb.

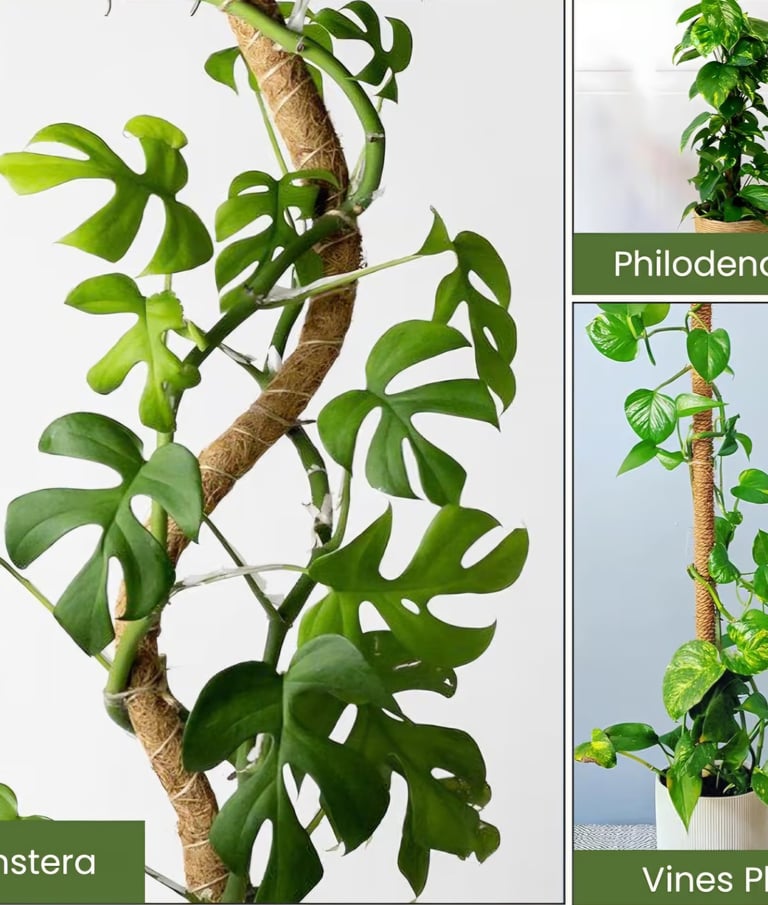
Climbing plants naturally grow upward and attach to vertical surfaces as they mature. When supported with a moss pole, these plants develop larger leaves, stronger stems, and more structured, upright growth instead of trailing or sprawling.
Plants That Thrive on Moss Poles
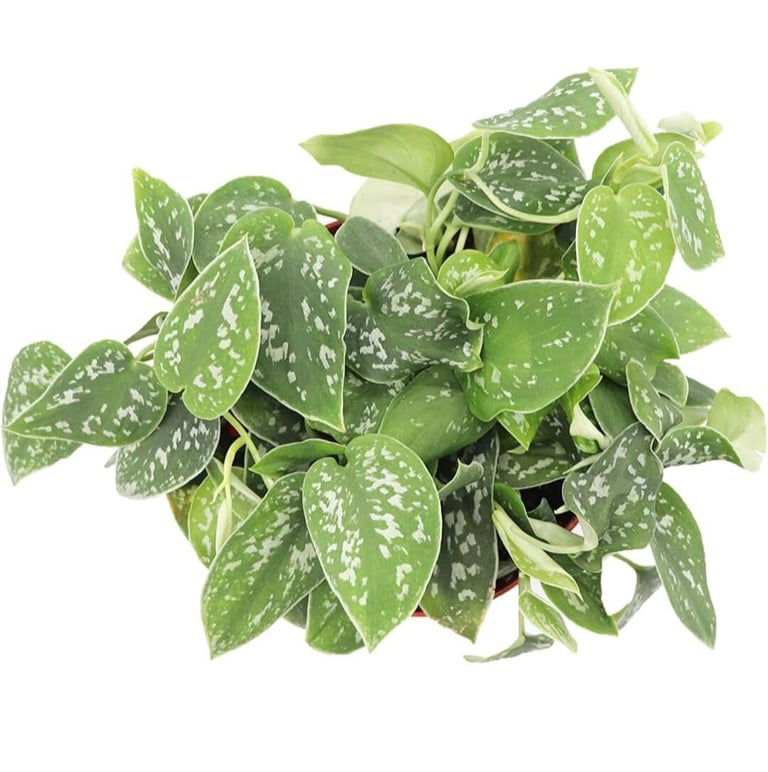
Known for its soft, silver-patterned leaves, satin pothos benefits from vertical support and develops fuller, more structured growth when trained on a moss pole.
Satin Pothos (Scindapsus pictus ‘Exotica’)
A fast-growing climber with unique blue-toned leaves. On a moss pole, it develops larger foliage and can begin to show splits as it matures.
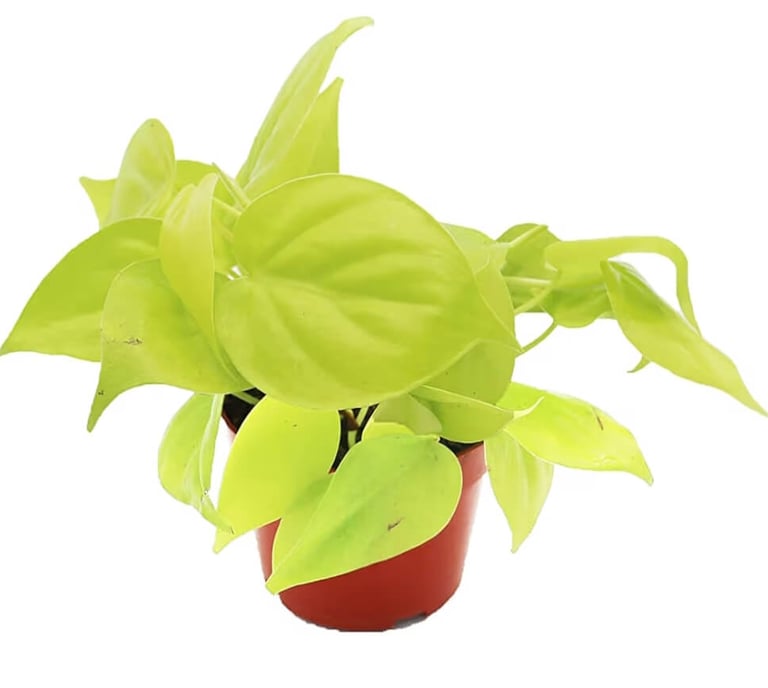
Neon Heartleaf Philodendron (Philodendron hederaceum ‘Lemon Lime’)
A bright, fast-growing climber that stands out from darker foliage plants. Moss pole support helps it grow upward while maintaining dense, vibrant growth.
A highly sought-after climbing plant known for its bold variegation. Vertical support helps stabilize growth and encourages larger, more structured leaves
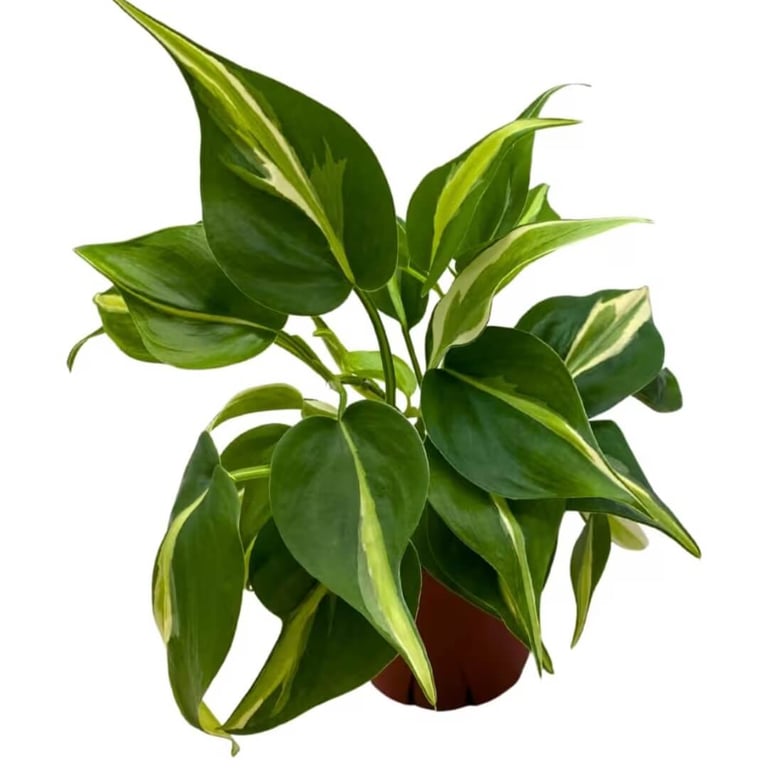
A variegated heartleaf philodendron with subtle striping. When trained vertically, it produces stronger stems and more controlled growth.
Philodendron Pink Princess
Cebu Blue Pothos (Epipremnum pinnatum ‘Cebu Blue’)
Philodendron Silver Stripe (Philodendron hederaceum ‘Silver Stripe’)
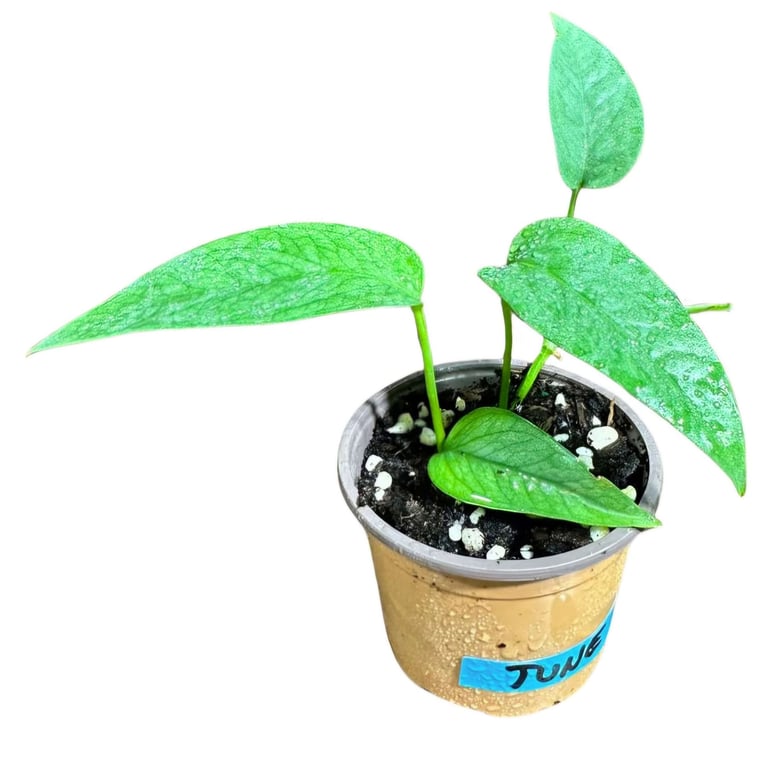
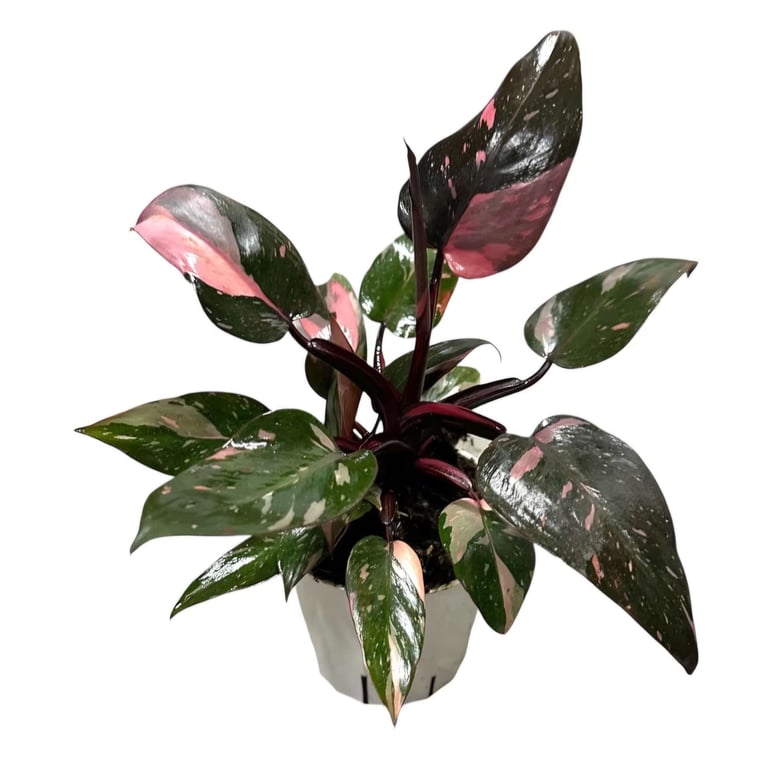
Choose climbing plants that naturally grow upward to get the most out of your moss pole setup.
Moss Pole Success Tips That Make a Visible Difference Fast
Mist the pole not just the plant.
Most plant owners mist the leaves. For moss pole success what matters is the surface of the pole staying damp enough to attract aerial roots. Mist the pole directly two to three times per week.
Train stems upward early.
The younger and more flexible the stem the easier it is to guide. Attach new growth to the pole loosely as it appears rather than waiting until it has set in a trailing direction.
Do not cut aerial roots.
Aerial roots that are reaching toward or attaching to the pole are doing exactly what they are supposed to do. Cutting them removes the plant's primary mechanism for climbing and feeding from the pole surface.
Extend the pole before the plant runs out of room.
Adding height to a modular pole while the plant still has six or more inches of clearance is easy. Waiting until the plant has grown past the top of the pole and begun to bend means detaching established growth to make the adjustment.
Increase humidity around the pole.
Higher ambient humidity keeps the pole surface moist longer between mistings and encourages faster aerial root attachment. A small humidifier positioned near climbing plants makes a visible difference in how quickly aerial roots reach for and grip the pole.
Fertilize consistently during the growing season.
A climbing plant on a moss pole is investing heavily in new growth — larger leaves, longer stems, aerial root development. Without consistent feeding it does not have the nutrients to sustain that output. Feed with a balanced liquid fertilizer at half strength every two to four weeks from spring through early fall.
Consistent feeding supports stronger, faster climbing growth.

Mistake 1: Installing a dry pole and expecting aerial root attachment.
Aerial roots are drawn to moisture. A dry pole is invisible to them. Fix it by soaking or thoroughly saturating the pole before installation and maintaining consistent surface moisture through regular misting.
Mistake 2: Using a pole that is too short.
A pole the same height as your plant gives you zero growth runway. By the time the plant reaches the top and starts bending, you have lost growing season. Always size up and use modular poles for fast-growing species.
Mistake 3: Attaching stems too tightly.
Tight ties cut off circulation and damage stems. The goal is gentle guidance not firm binding. Use soft flexible ties and leave room for the stem to thicken as it grows. Check ties monthly and loosen any that have become snug.
Mistake 4: Letting the pole dry out completely.
A moss pole that cycles between very wet and bone dry confuses aerial roots and discourages attachment. Consistency is what drives attachment — aim for a surface that is always slightly damp rather than alternating between soaked and dry.
Mistake 5: Expecting instant results.
Aerial root attachment takes time. Most plants take two to six weeks to begin visibly attaching to a new pole. During this window maintain moisture, keep the plant in bright indirect light, and do not move the setup. Disrupting the plant during the initial attachment phase resets the process.
Mistake 6: Not fertilizing a climbing plant.
A plant being asked to produce larger leaves, longer stems, and aerial root systems has significantly higher nutrient demands than a plant sitting in a pot doing nothing. If you added a moss pole but did not increase your fertilizing consistency, growth will plateau. Feed regularly throughout the active growing season.
Fix small issues early to keep your plant climbing and growing the right way.
Moss Pole Mistakes That Slow Growth — And How to Fix Them Fast

Frequently Asked Questions about Moss Poles
Q1. What is a moss pole used for with indoor plants?
A moss pole gives climbing houseplants a vertical support structure with a moisture-retaining surface for aerial roots to attach to. It replicates the trees and bark these plants climb in the wild, triggering larger leaf production, stronger stem growth, and faster overall development than unsupported trailing plants achieve indoors.
Q2. Do moss poles actually work for Monstera?
Yes, and the results are dramatic. Monstera plants climbing a well-maintained moss pole consistently produce larger leaves, more reliable fenestrations, and faster growth than the same plants left to trail. The vertical climbing signal combined with aerial root moisture access triggers the growth response Monstera is capable of but rarely reaches indoors without support.
Q3. When should I add a moss pole to my plant?
Add a moss pole when your plant has four or more leaves and is showing active growth, when you see aerial roots developing along the stem, or at your next repotting. Earlier is always better — younger flexible stems attach to poles far more easily than older woody growth, and establishing the climbing habit early produces better long-term results.
Q4. How do I keep a moss pole moist?
Mist the pole surface directly two to three times per week using a spray bottle. The goal is a surface that feels consistently damp — never dripping but never dry. Some growers use a thin PVC pipe with holes drilled along its length inserted through the center of the pole to water from the top down, which keeps moisture more even throughout the pole.
Q5. What plants do well on a moss pole?
Monstera Deliciosa, Monstera Adansonii, Philodendron Brasil, Heartleaf Philodendron, Pothos, Rhaphidophora Tetrasperma, Scindapsus, and Epipremnum all perform exceptionally well on moss poles. These are all natural climbers that respond to vertical support with larger leaves and faster, more vigorous growth.
Q6. Should I use a pre-filled or DIY moss pole?
Pre-filled poles are best for beginners who want zero prep and immediate setup. DIY poles are better for long-term growing setups where you want full control over fill material, moisture retention, and maintenance. DIY setups outperform pre-filled poles over time and are more cost effective for growers with multiple climbing plants.
Q7. Why are my plant's aerial roots not attaching to the moss pole?
Almost always a moisture issue. Aerial roots are drawn to damp surfaces — if the pole is dry they will ignore it entirely. Soak or thoroughly mist the pole and maintain consistent surface moisture through regular misting. Aerial roots typically begin attaching within two to six weeks of consistent moisture maintenance.
Q8. How tall should a moss pole be?
Choose a pole that is at least as tall as your plant and ideally 12 to 18 inches taller to give room for upward growth. For fast-growing plants like Monstera Deliciosa, use a modular stackable pole system from the start so you can add height as the plant grows without disturbing established root attachment.
Q9. Can I add a moss pole without repotting?
Yes, but it is more disruptive than installing at repotting time. Carefully press the pole into the existing soil as close to the center of the pot as possible without severing major roots. The main risk is root damage during insertion — work slowly, avoid forcing the pole through dense root zones, and mist the plant thoroughly after installation to reduce transplant stress.
Q10. How do I attach my plant to a moss pole?
Use soft flexible plant ties, twist ties, or strips of pantyhose to loosely guide stems into contact with the pole at several points. Attach gently — the goal is proximity not pressure. Aerial roots will do the actual work of gripping and anchoring once the pole surface is consistently damp. Check ties monthly and loosen any that have become tight as stems thicken..

Create a Reliable Indoor Plant Care Foundation
If your plant care feels inconsistent, your soil is often the starting point.
A balanced indoor soil mix gives you a stable foundation so watering becomes easier, roots stay healthy, and plants grow more predictably.
Instead of constantly adjusting your care routine, start with a mix that works with your environment.
Fix your plant setup + stay consistent →
Build a reliable plant system
Not sure what mix is right for you?
Ready to build your full plant setup?
Your soil mix is probably the problem


most potting mixes straight from the bag aren't cutting it. grab the free recipe guide and see exactly what your plants actually need.
Most of my favorite things ship for free with a Prime membership. If you haven't tried it, there's a free trial available here.